tuttivini
Forum Replies Created
- AuthorPosts
-
@krin: WauW!!! Thank you for the link to the old posts from user Ravsted.
I’ve never seen that topic and I am very happy finding the STL files for other Beolab models.
I found it for the Beolab 7. So maybe I can make the lammela’s for my 7.1, to match my above 8000’s.
@Ravsted: Thanks for designing and sharing your STL files (I think I can’t draw this myself…). Any change to also create them for 6000’s? I have a set in another room and would love to match them with my above build 8000’s…And @Ravsted: What are the WxHxD dimensions for the wooden lammelas for the 7.1?
Are the designed for 4mm thick wood?
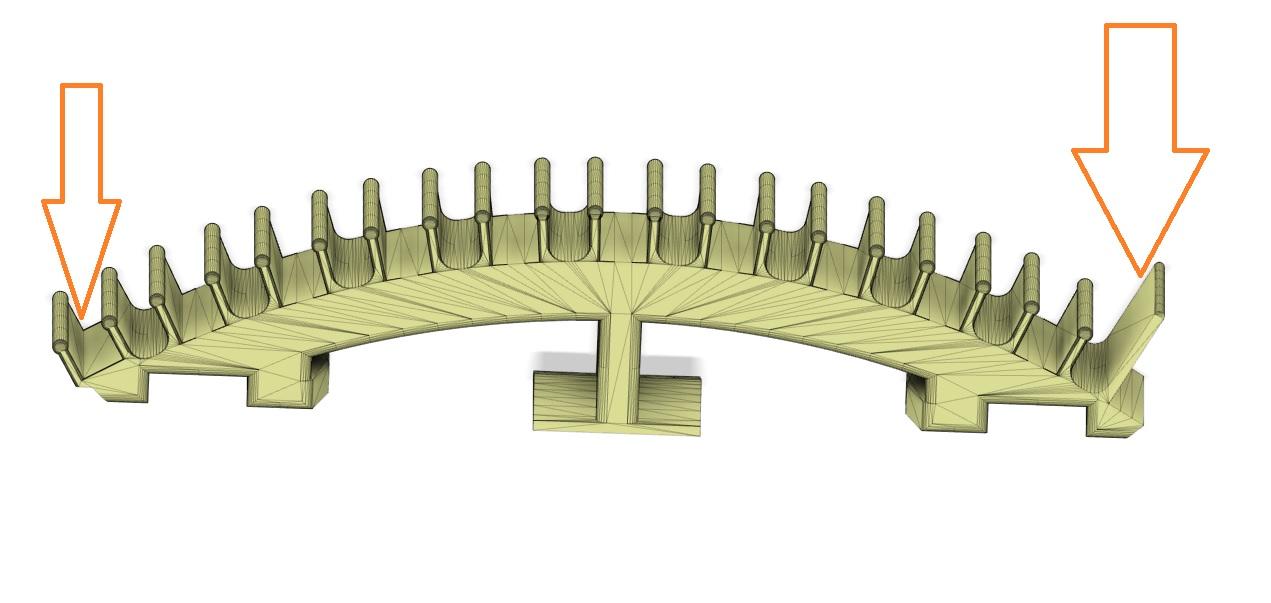
Can you explain to me how to use the 7.1 brackets? When I look at your STL file, I see room for 10 wooden slats, but I see a slightly longer piece on one outside and an extra notch or something like that on the other outside?
The 7.1 STL doesn’t look the same as your own photo’s in your first post: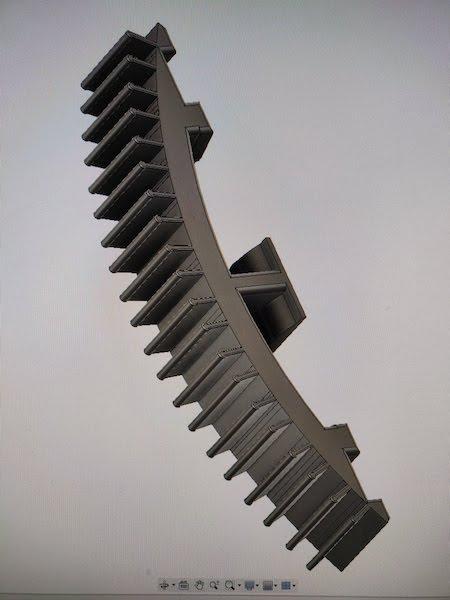
Thanks @matador for your enthusiastic reply.
Without your starter kit, without your beautifully designed ‘Ikea homage manual’, without your brother in law (who I believe designed the 3d prints?), I never could have brought myself to actually make them.Because everything was so nicely ‘pre-assembled’, we could spend more time on finishing sanding the slats.
How nice that you recognize me again from my posts in the old ‘Flash your B&O topic’. Thank you for the compliments about my setup/self made TV-wall.
I live in The Netherlands and no 5mm slats are sold here either. So I bought 4mm slats.
4x18x2100: Which I had custom made by the wood trade to 4x13x1000 (and then a total of 28 slats for one set of BeoLabs)
4x44x2100: Which I sawed myself in a length of 1000mm (a total of 2 slats needed for one set of BeoLabs)
I also placed a piece of matte black cardboard cut to size over the large light green colored stickers that are on the BeoLab 8000s. The stickers include the serial number, etc. If you look diagonally through the hardwood slats, you will see those stickers. Matte black cardboard pasted over it so that you no longer see the stickers (but the cardboard can be carefully removed if you ever want to make serial numbers etc visible again / return to original).
@Tignum: Thanks for the compliment.The cabling isn’t for my rears: The last 3 photos are my dads Beolab 8000’s (we made 2 sets of wooden covers), so those are placed in his house. First 4 photos are in my own house.
He uses black snake skin to get the cabling to his baseboards.
I myself use black rubber hollow hoses to guide the audio&power cables from my 8000s and 2 (subwoofer) to my self-made wall unit.
(I think B&O originally also used rubber hoses for cabling, but they have switched to snake-skins in recent years)
I finally made 2 sets (4 Beolab 8000’s) last week, together with my dad (one set for him, one for myself).
The fitment is EXCELLENT.
The look is STUNNING. Soooooo beautiful!
Friends who now see the Beolab 8000’s say: They have been transformed from a speaker into a designer piece of furniture in the living room.Thank you so much for the STL files!
We have sanded all 32 wooden slats (HARDWOOD) (so 64 wooden slats in total!) nicely rounded. This was quite a lot of work but it looks so chic.
We used 4 3D-printed brackets per speaker. This gives more strength than 3 pieces and ensures that the distance between the slats remains identical everywhere.
We glued all slats to the brackets with transparent glue. As a result, they are nut-tight and can be slid on and off the speaker in one piece.
We made the ‘top-plates’ from sturdy cardboard and sprayed them black with a black rubber spray (Plastidip).
What do you guys think?
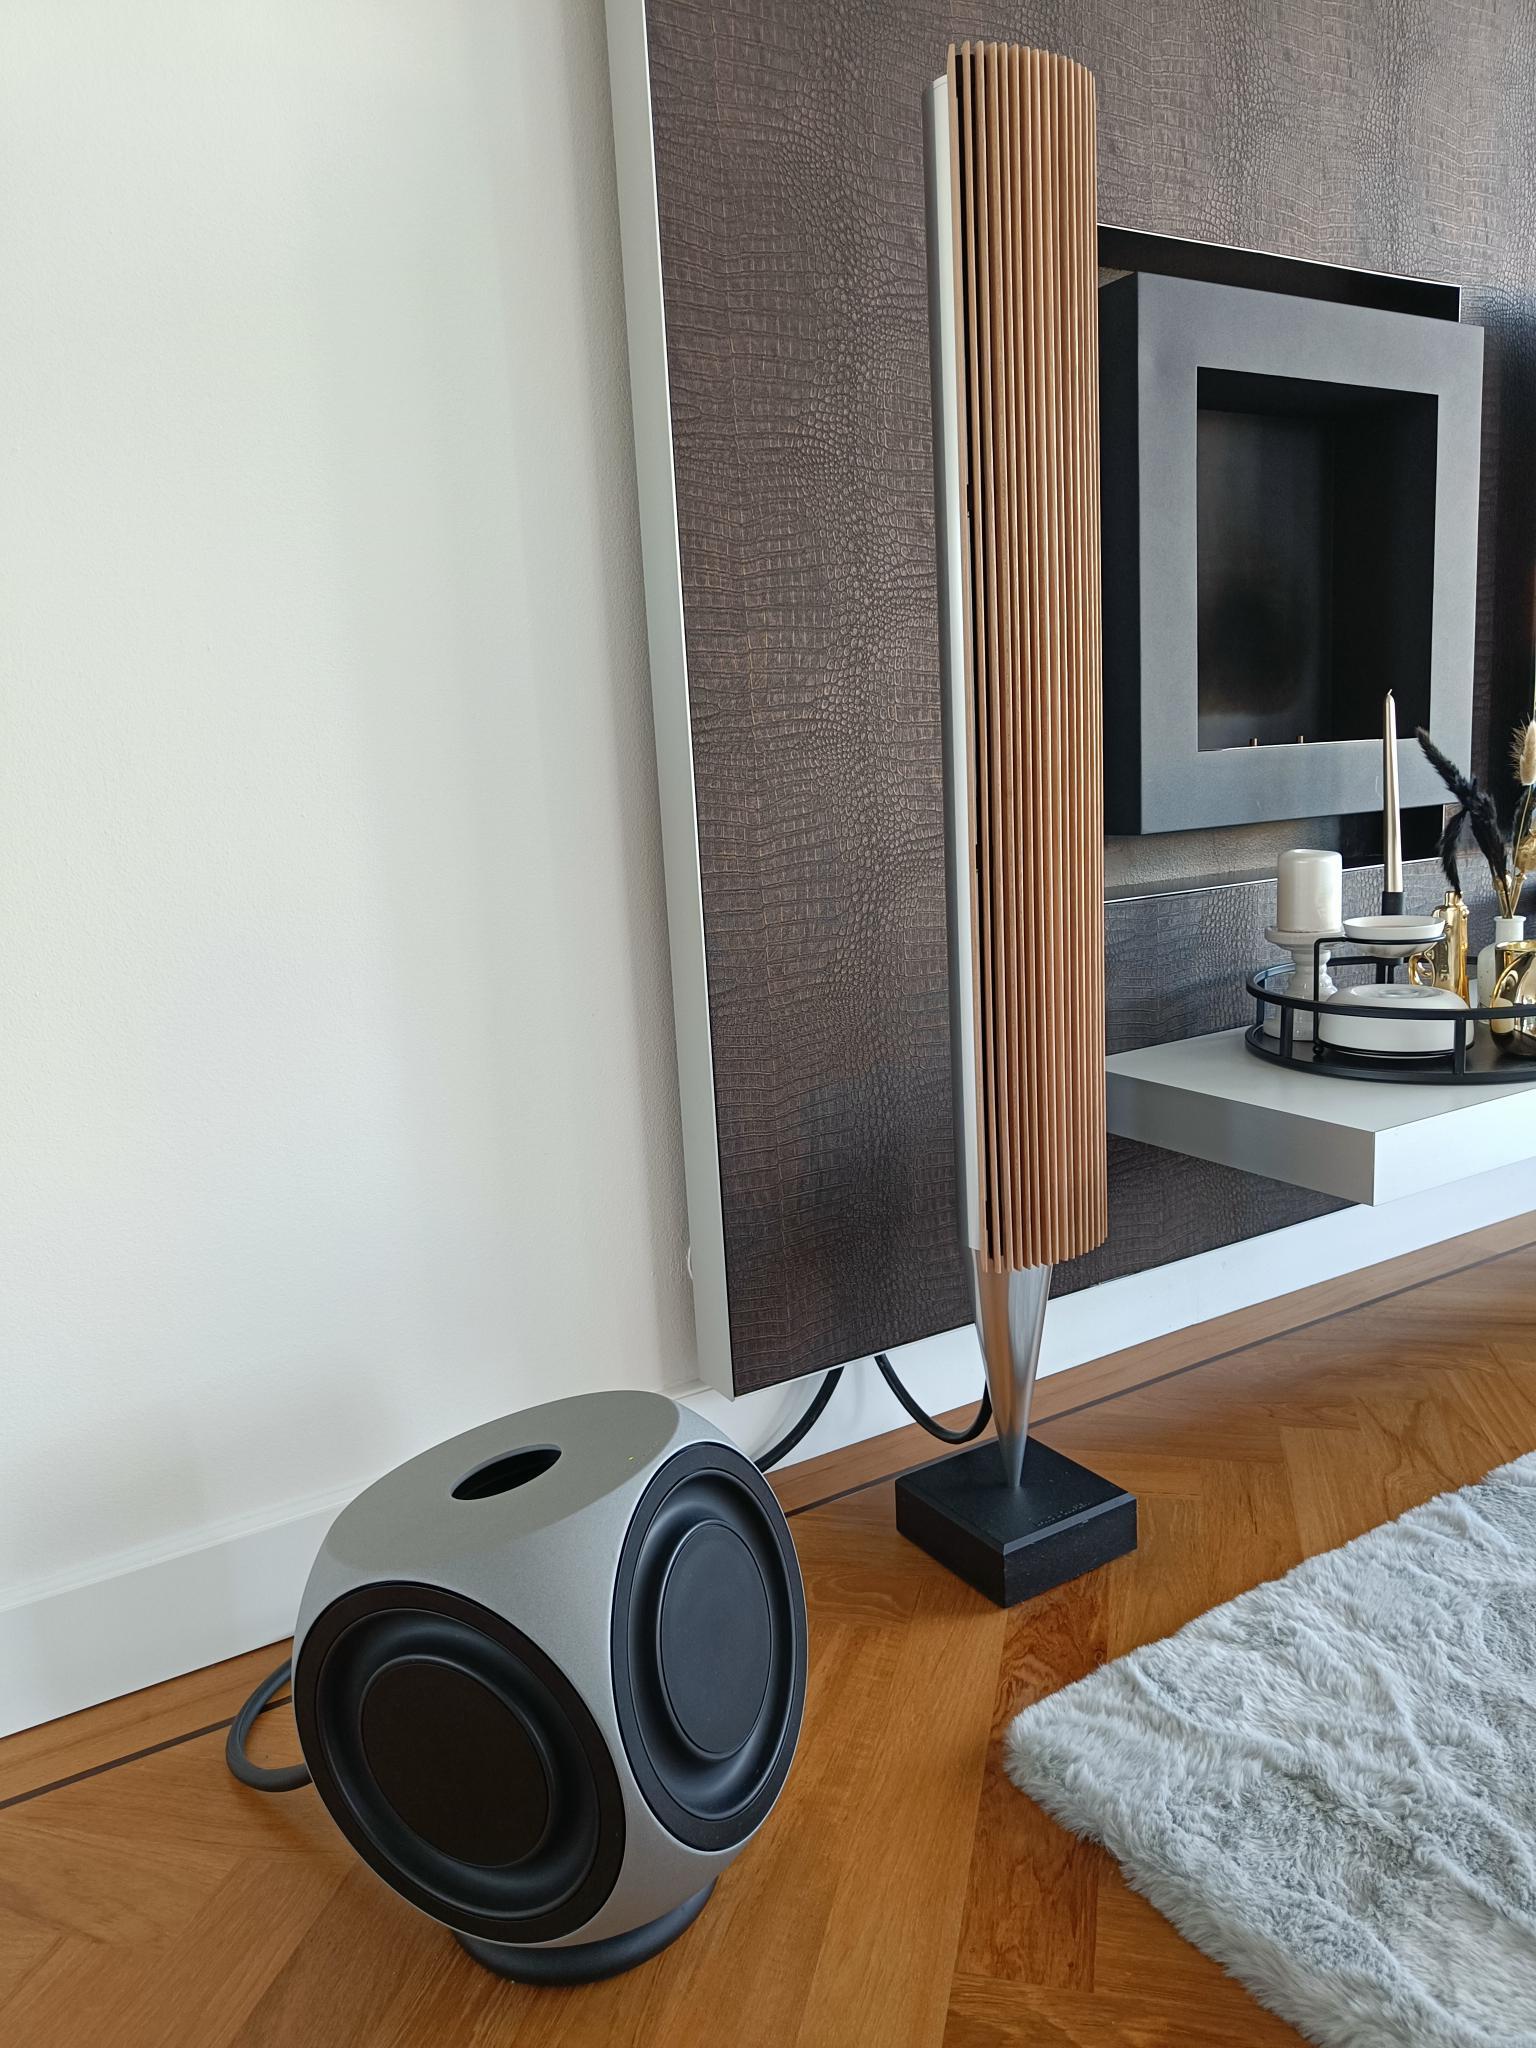
In my situation I also have a Beolab 7.1 as a centre speaker (see photos).
Who knows, I may one day be able to design brackets for that too (or have them designed) to provide them with these beautiful wooden slats. But maybe that can also look a little too ‘busy’…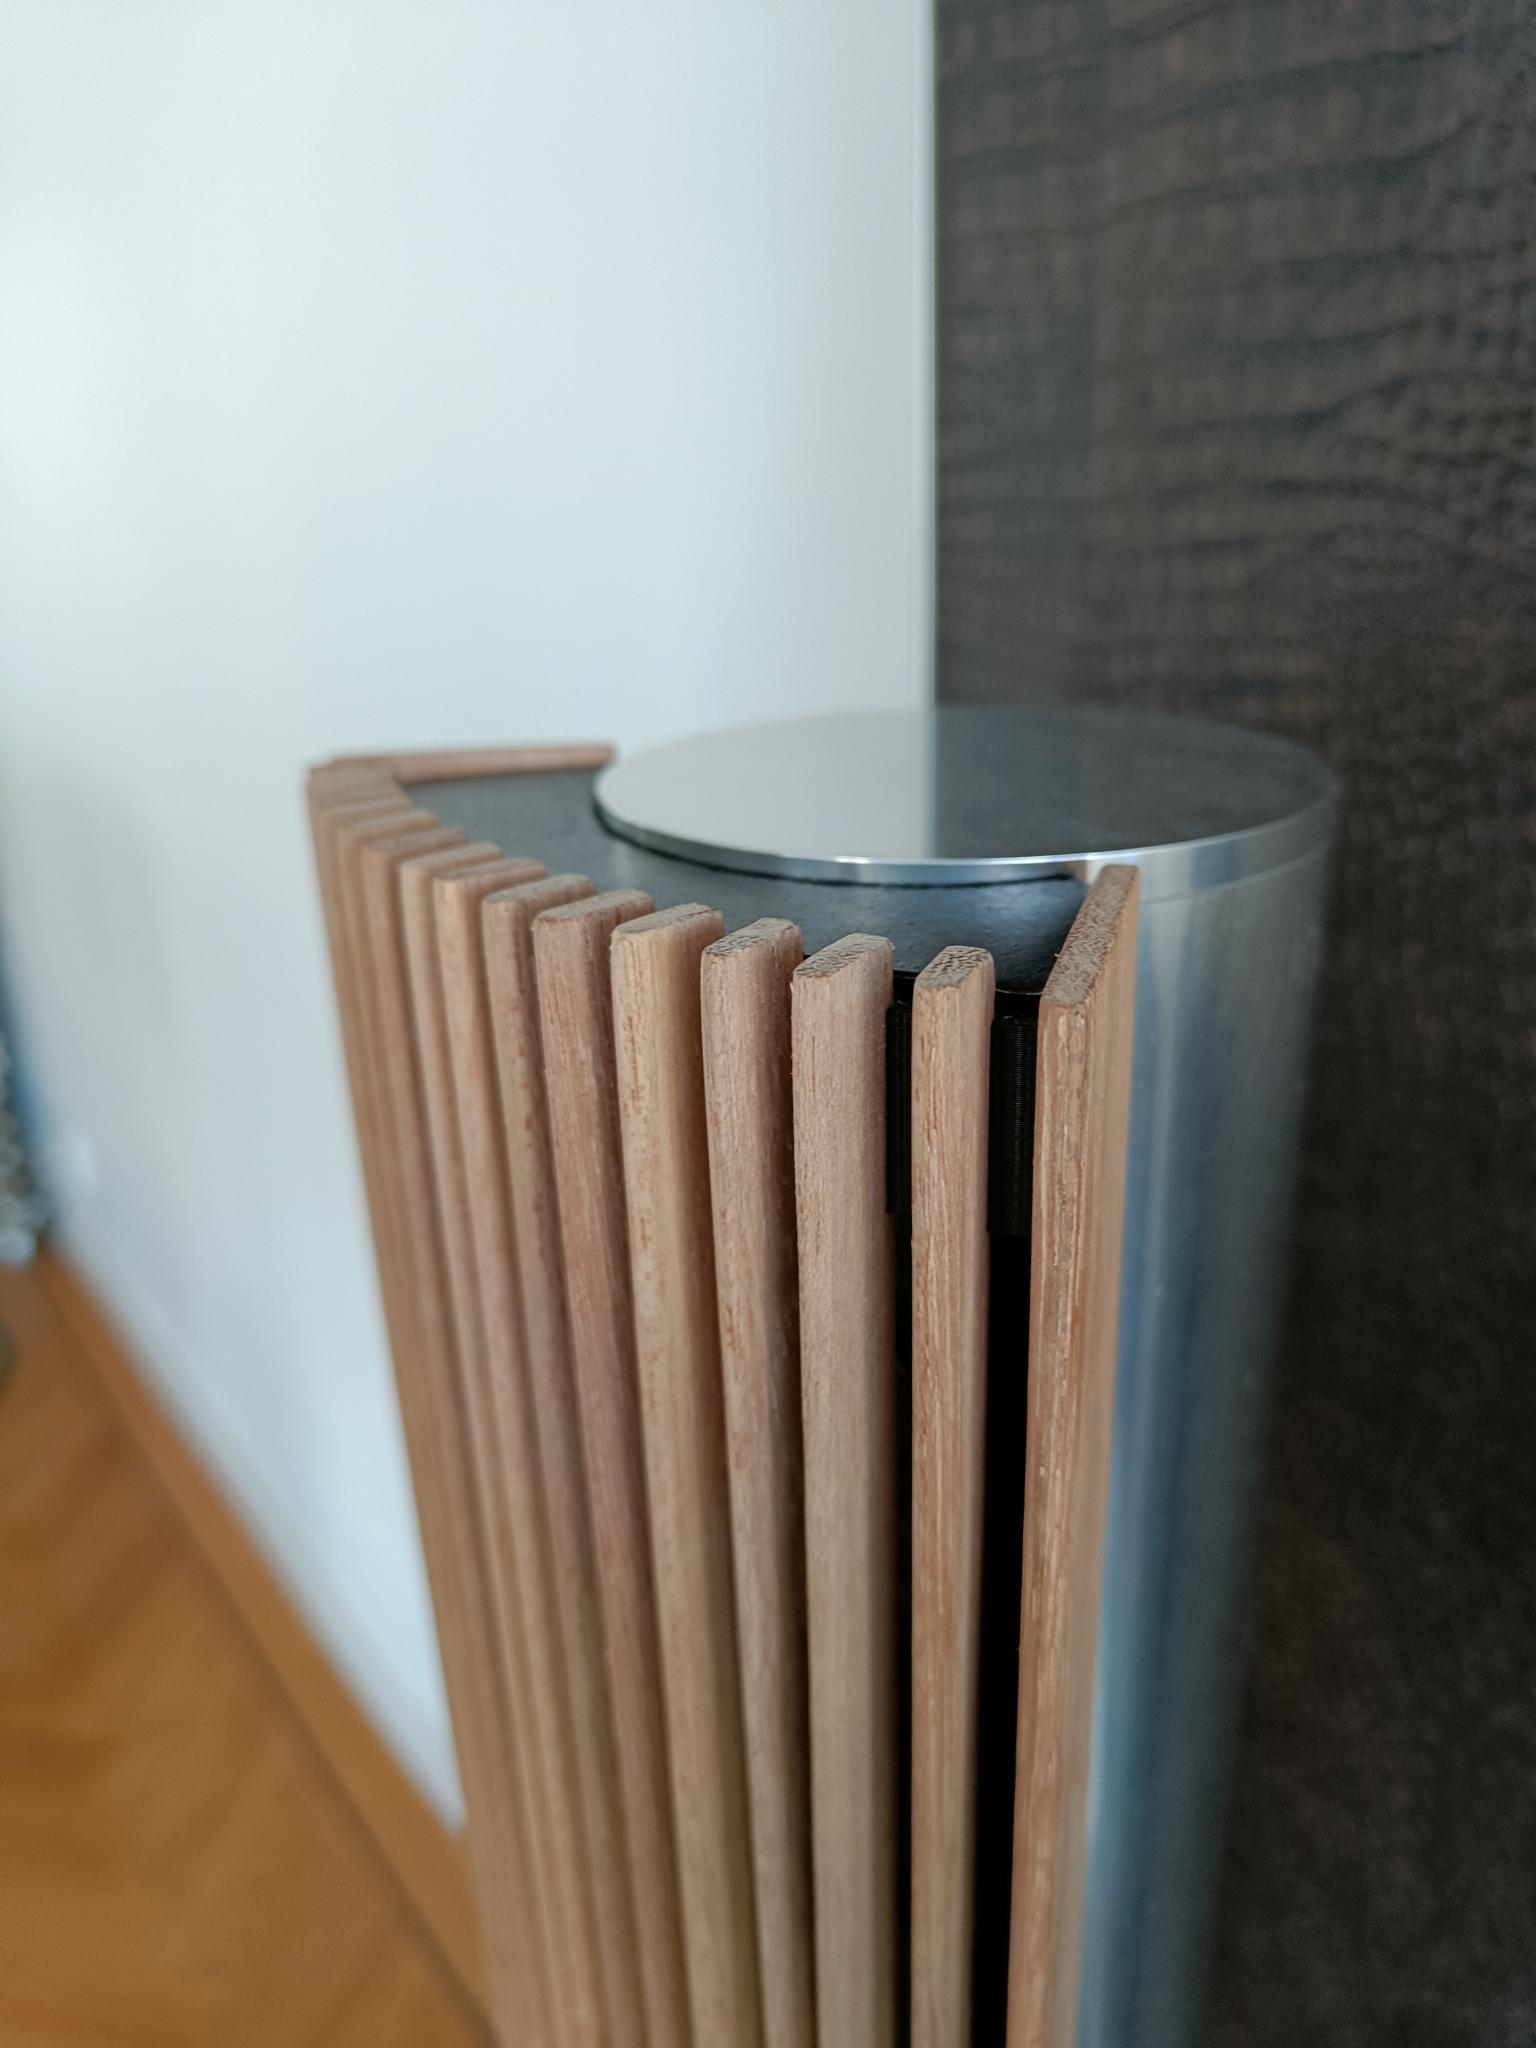
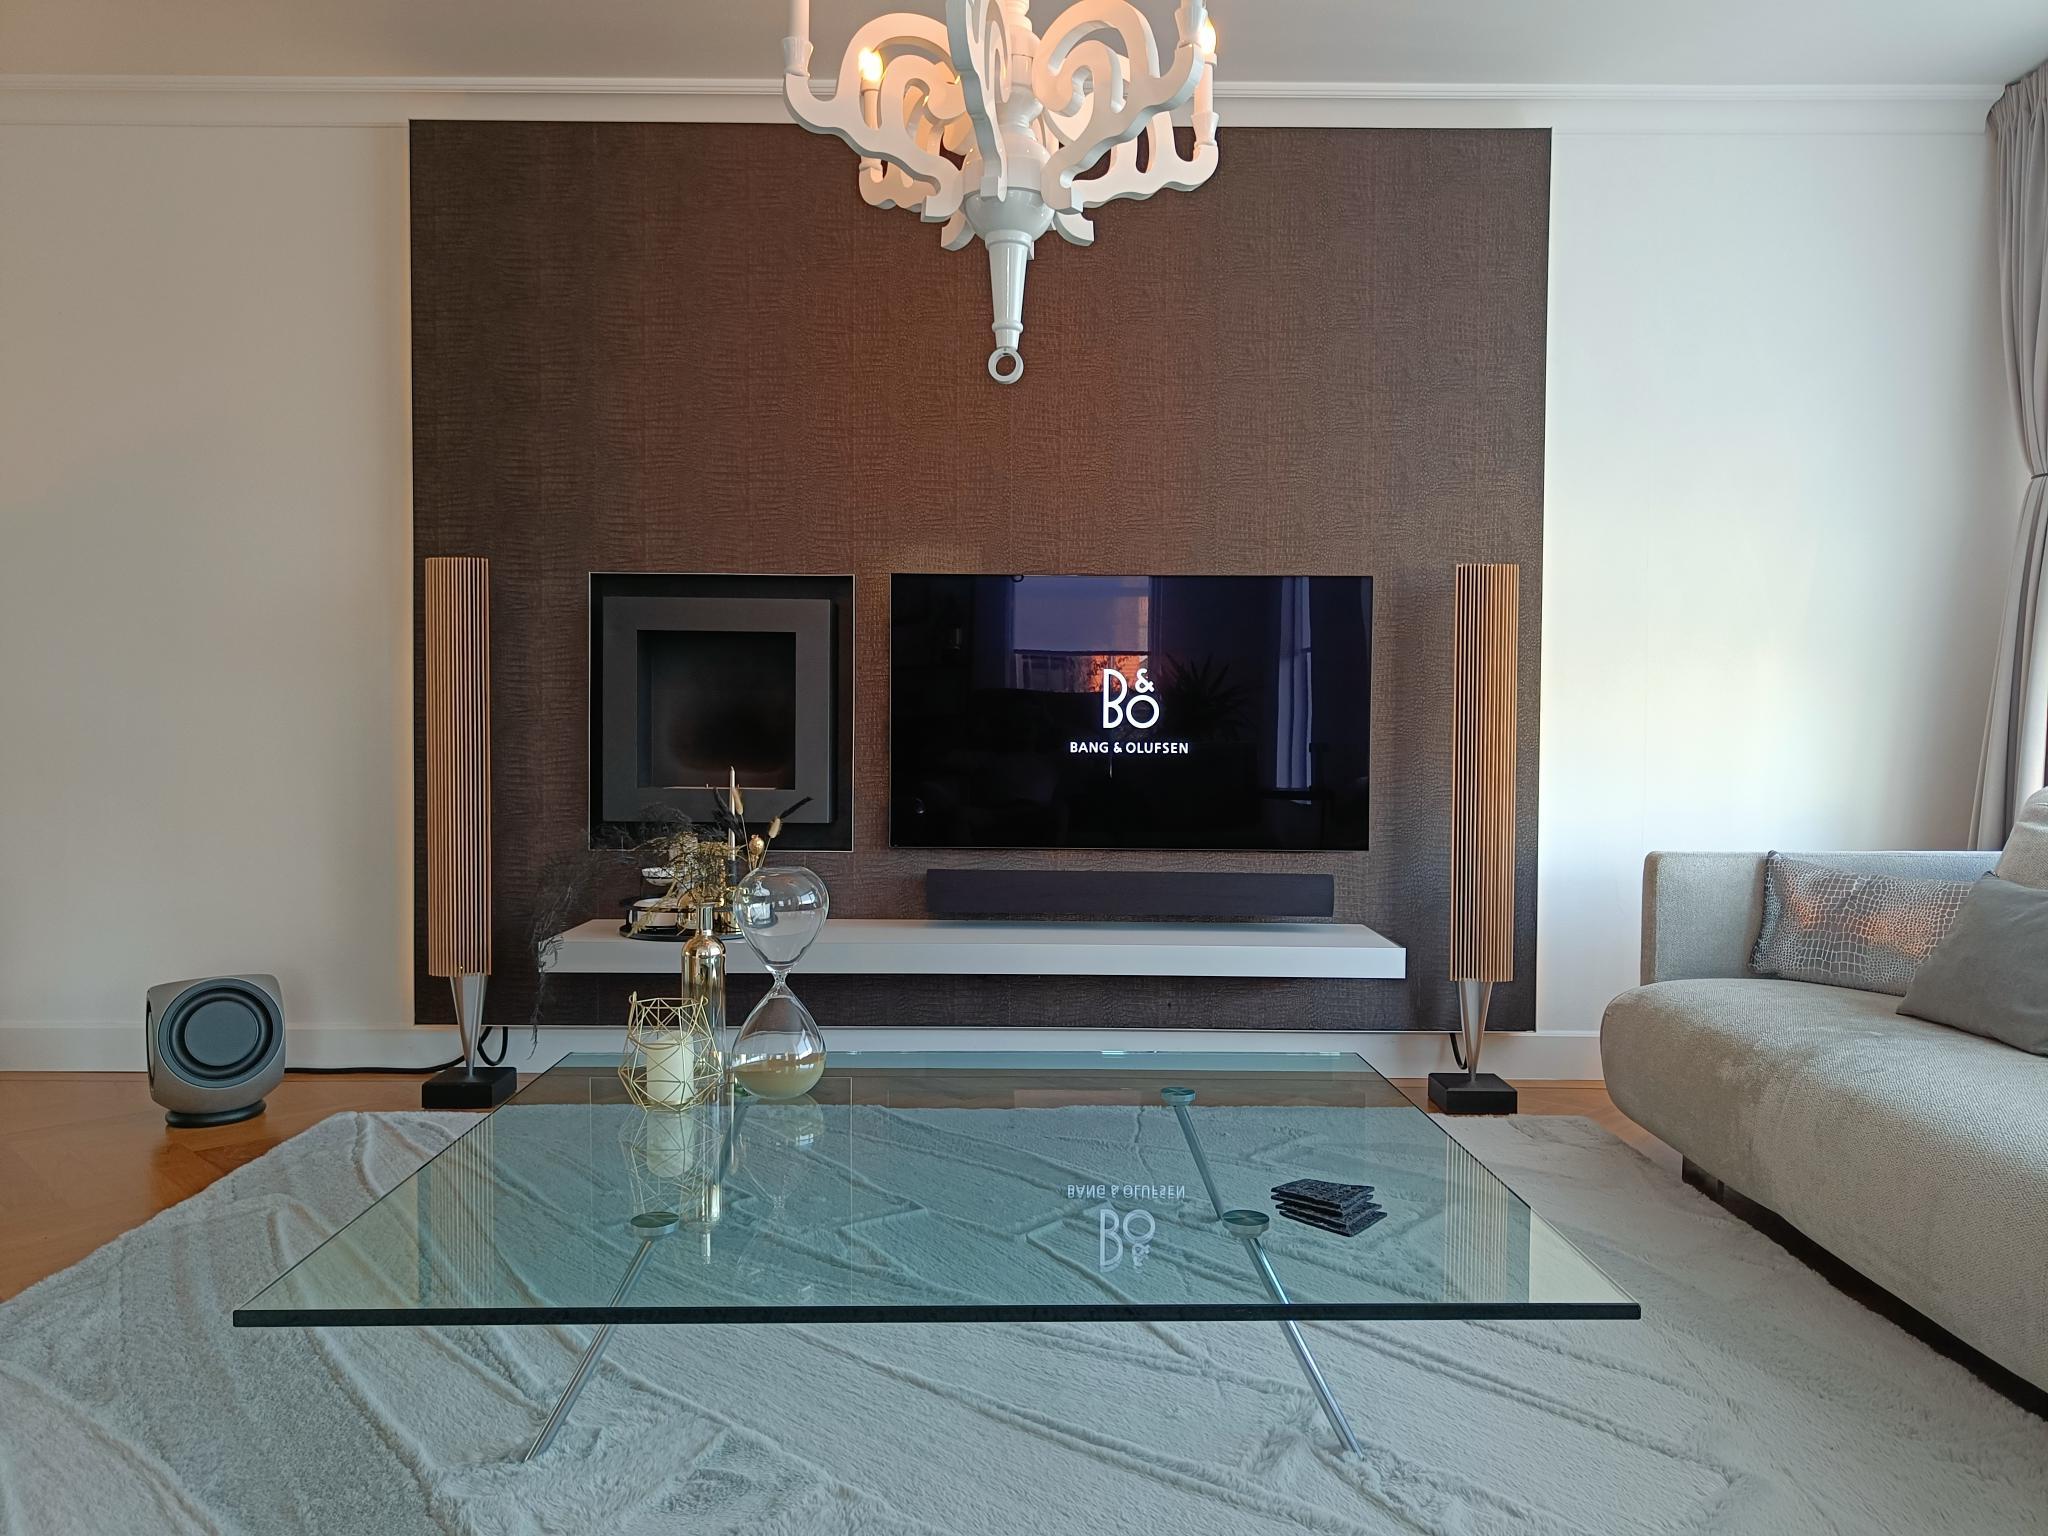
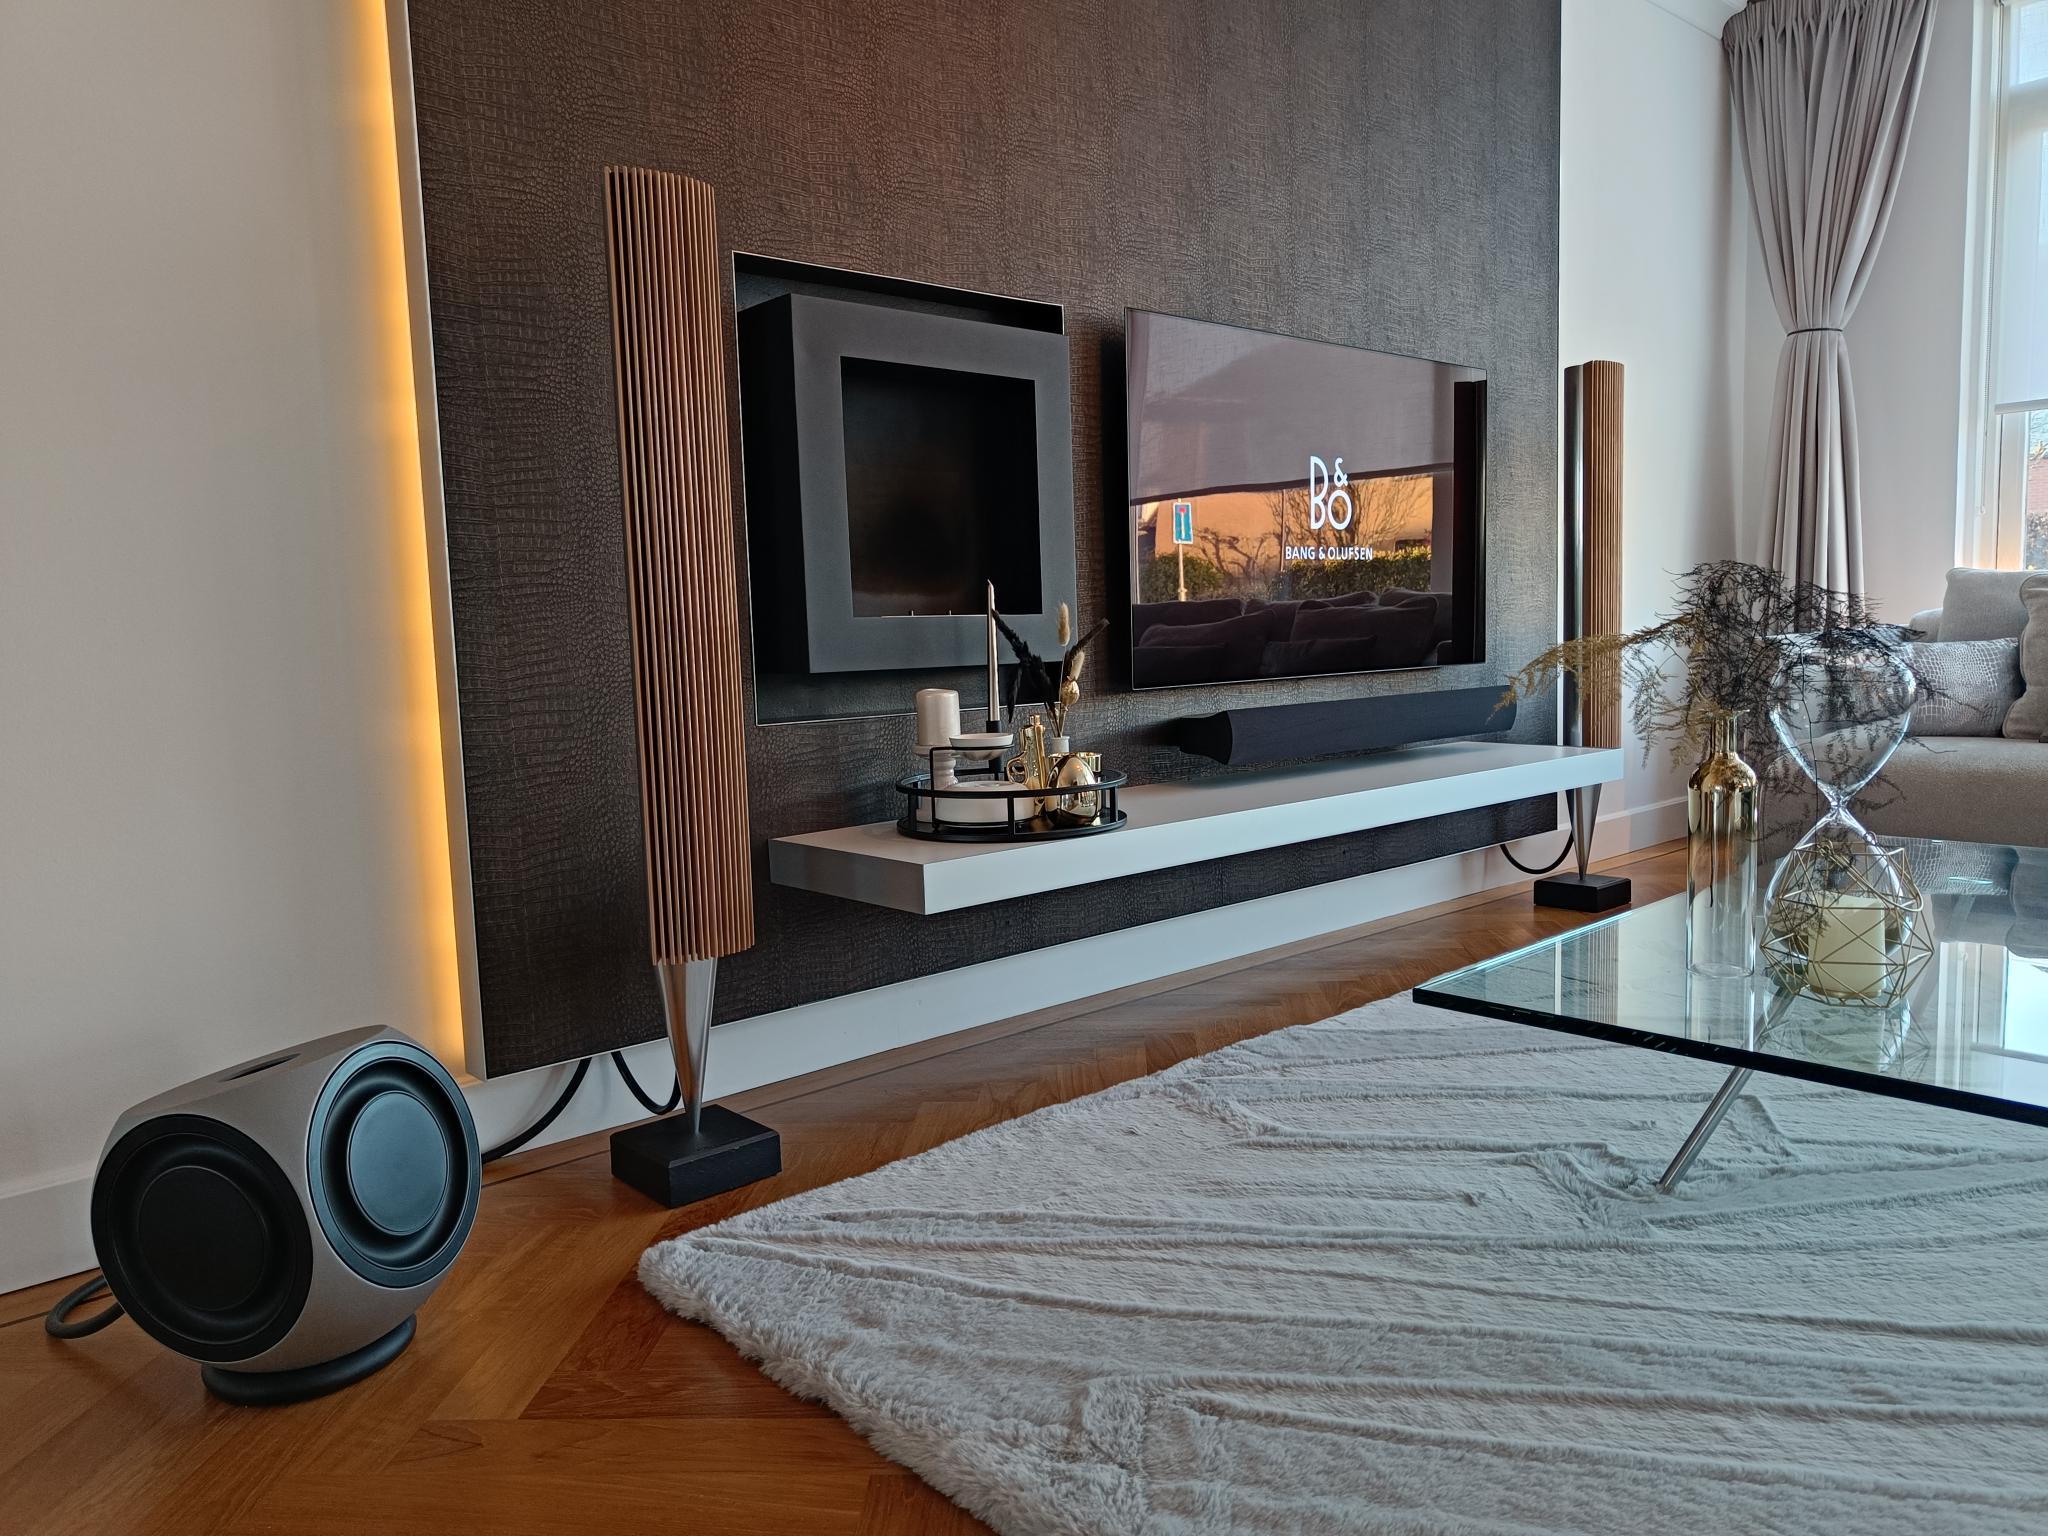
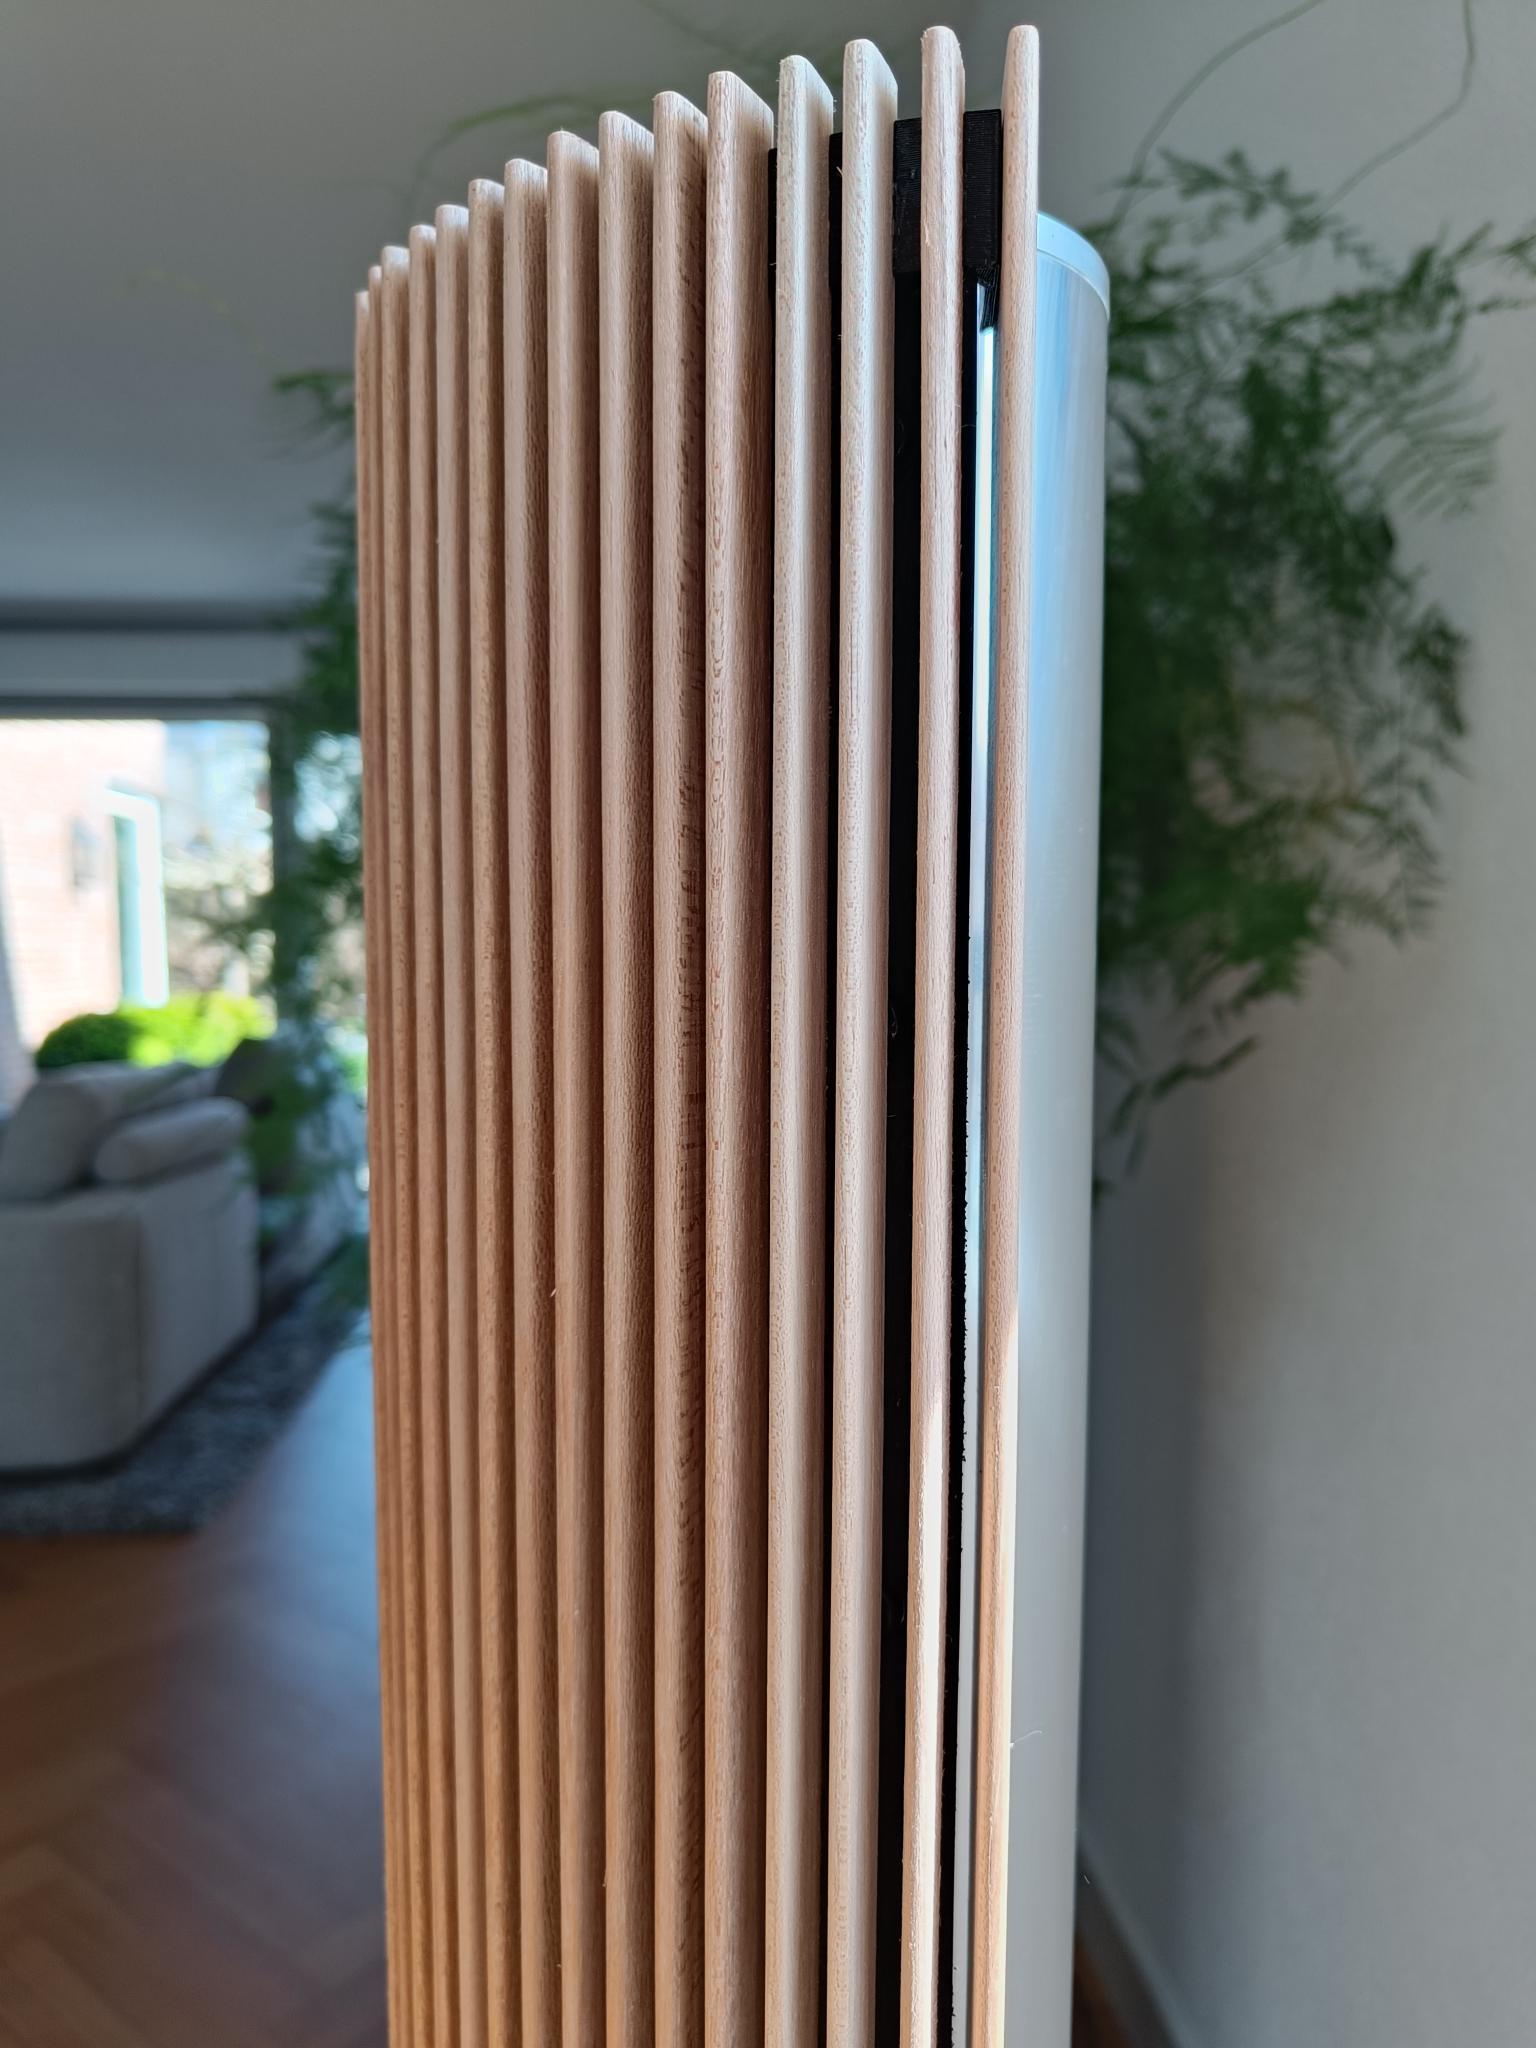
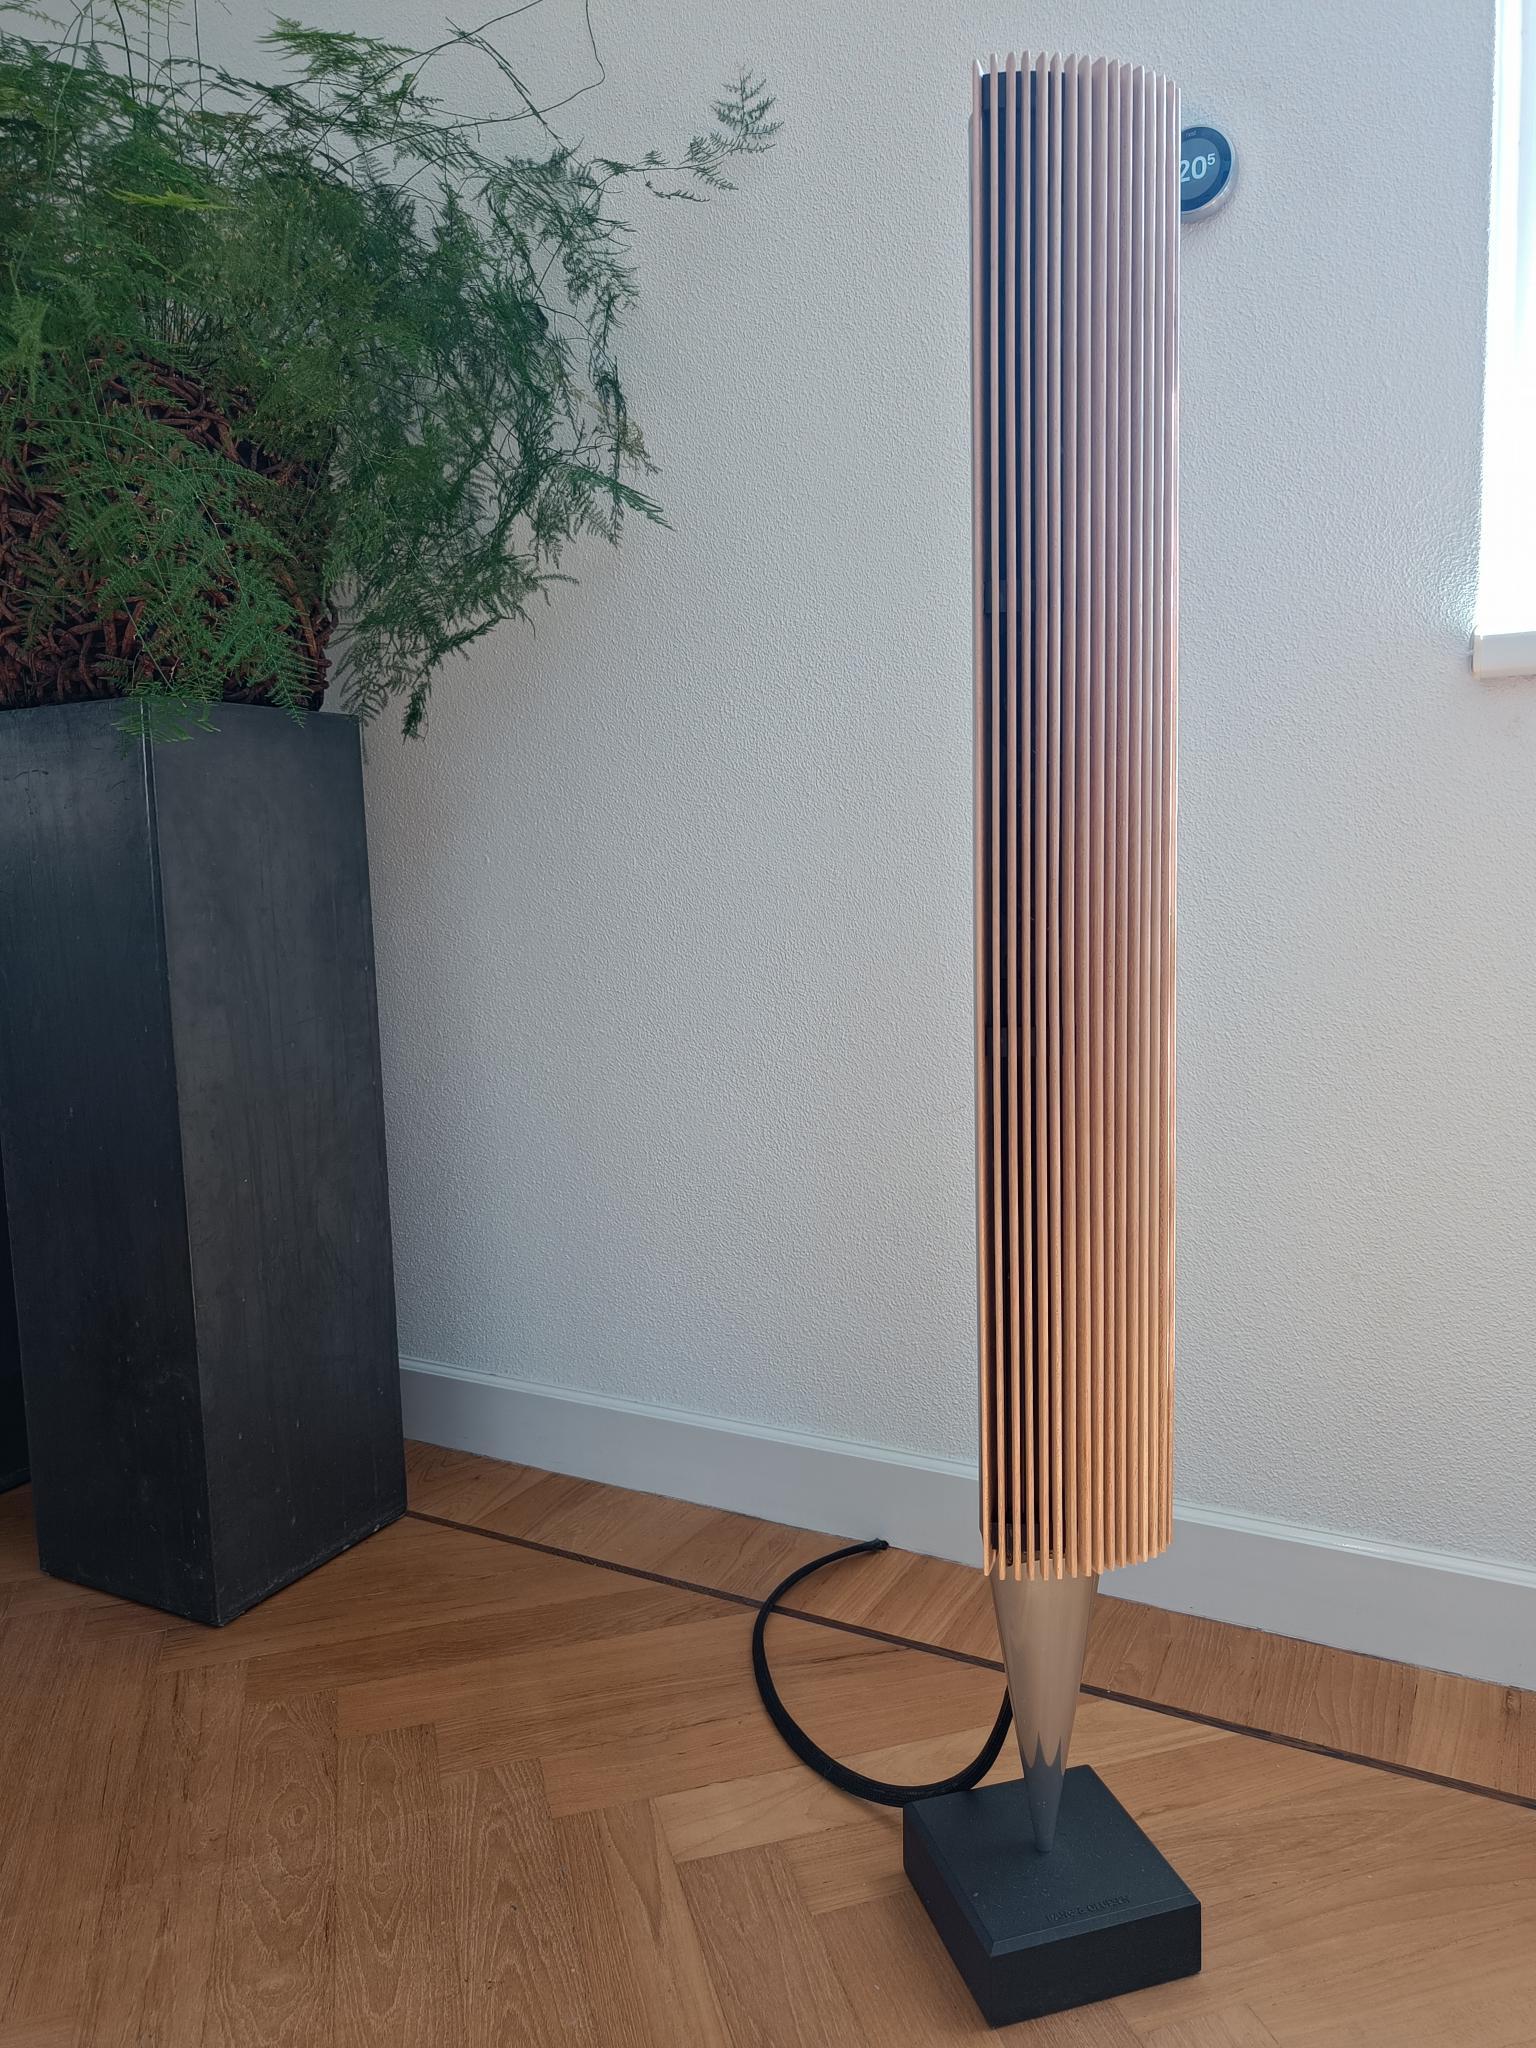
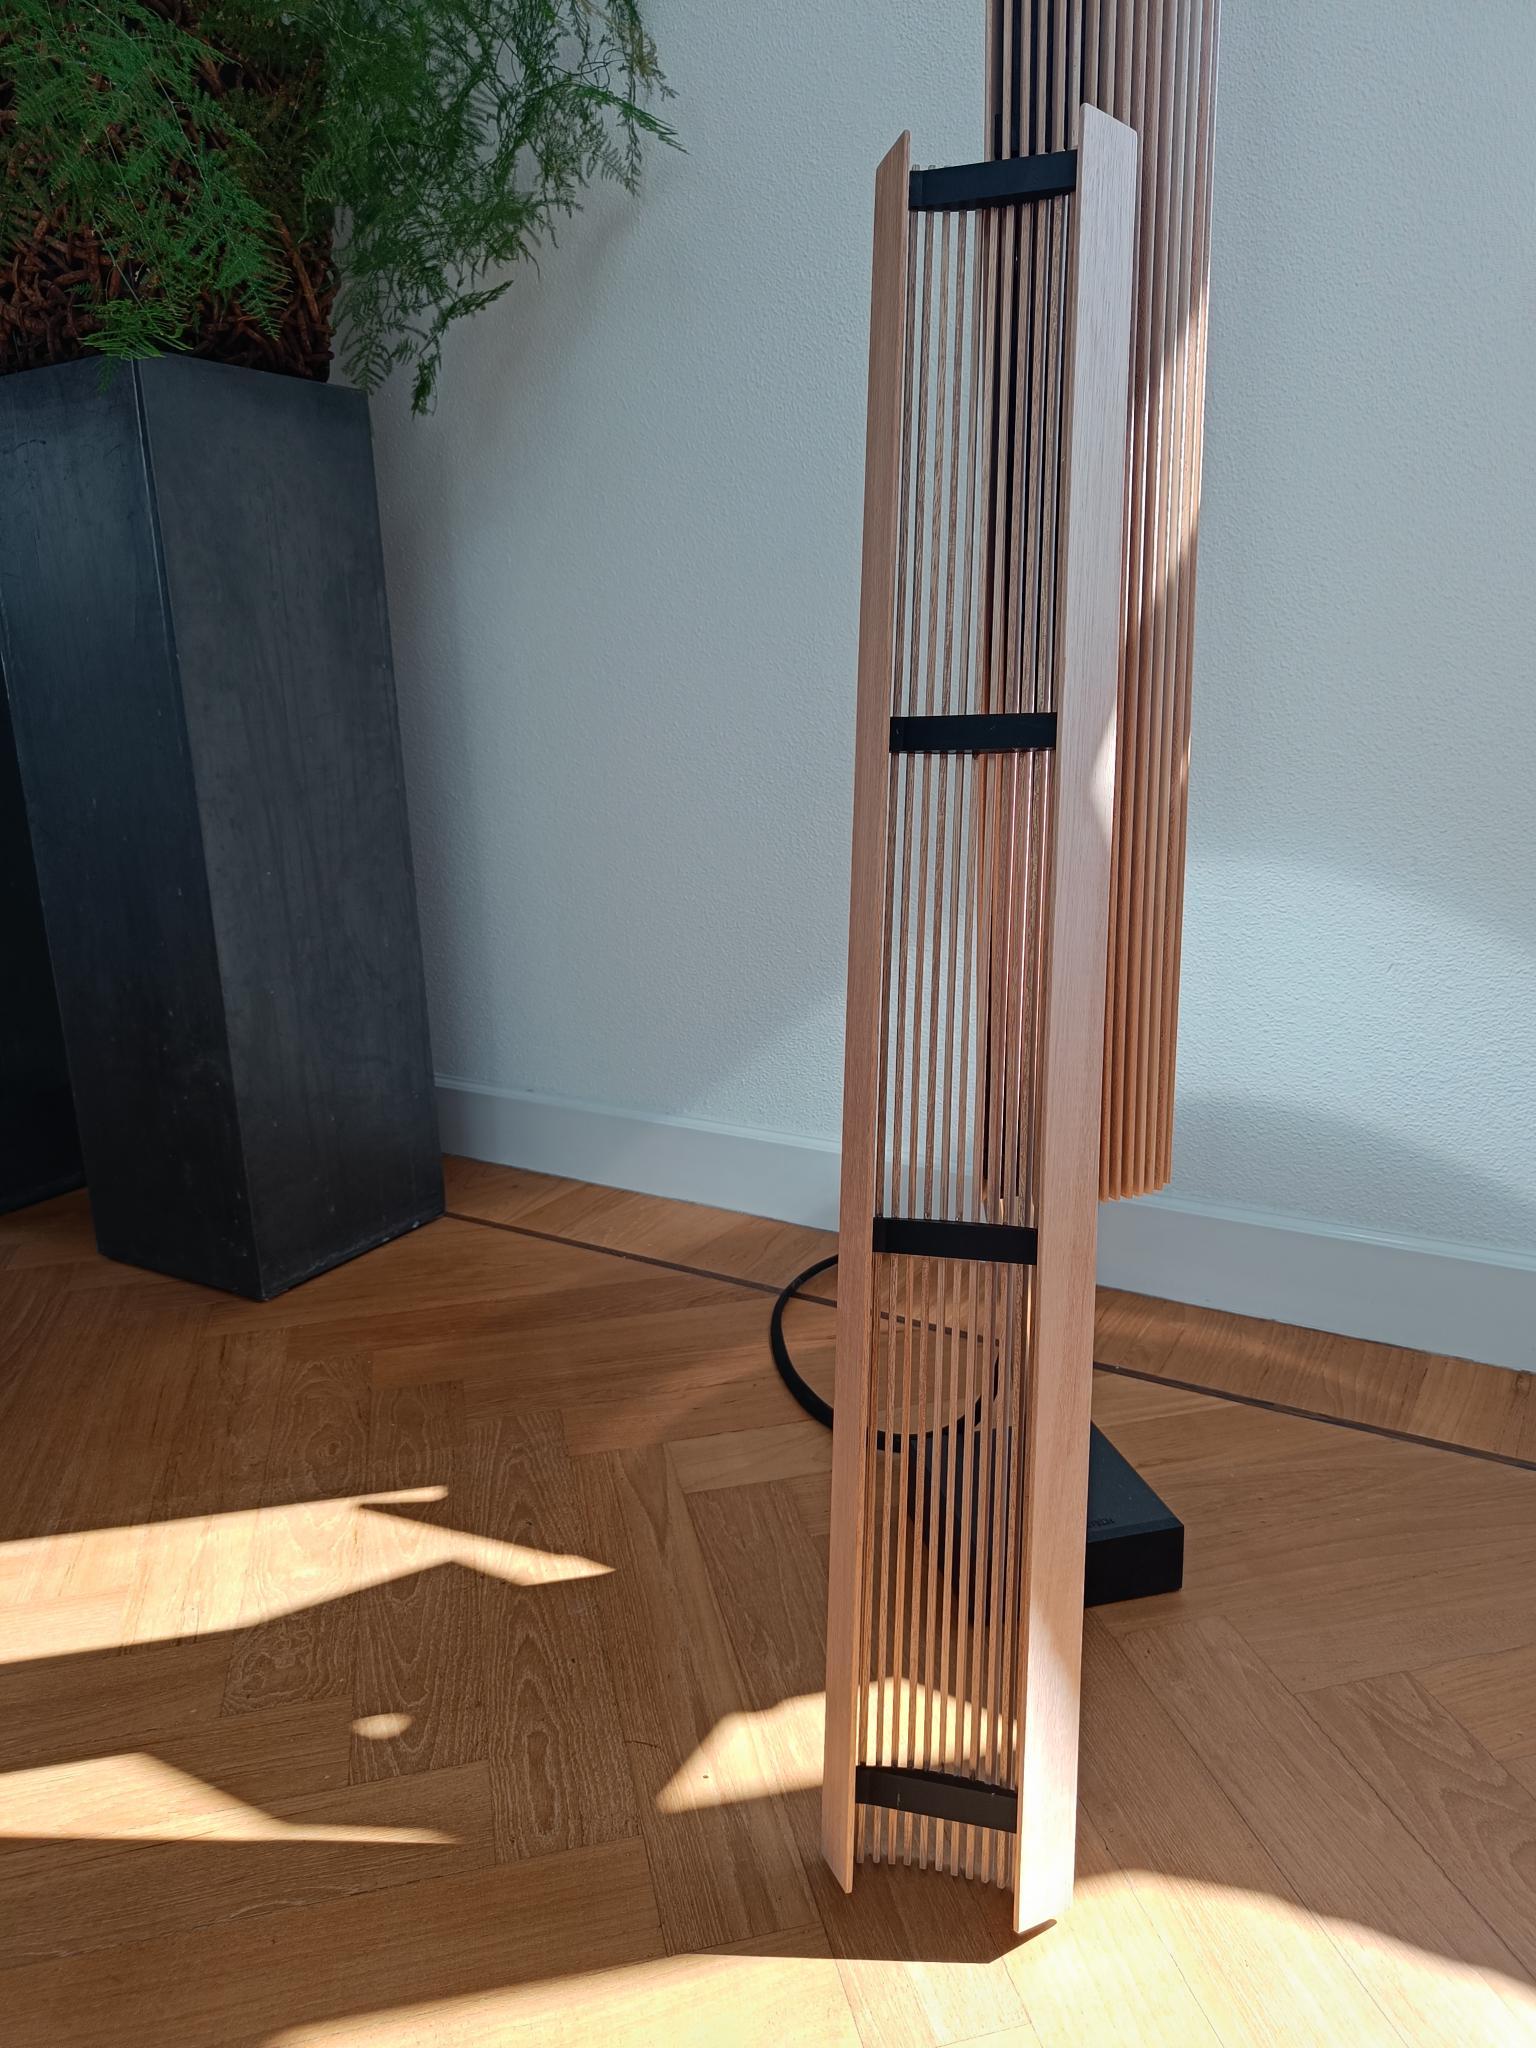
@matador Why are the slots in the 4mm only ~2.2mm deep?
Is this enough to ‘clamp/hold’ the lammellas firmly?Hi all Here in Denmark it seems that 5mm frets are more easily available. I have therefore created clamps based on 5mm frets. I have created new STL files based on Matadors original clamp design, but slightly changed. They are 5mm wide, a litte deeper in the groove and more curved. There is also 3 clamps now. A Top, Middle and Buttom. The Top and Middle clamps rests on the speaker structure – and the Buttom just floats. You can choose to replace the Middle with the Buttom clamp if you wish. The clamps were made in Fusion 360. I have provided both the Fusion 360 files and the STL files. That way you can adjust the clamps to your specific needs if needed. Credits go to Matador for starting this. He also approved to add the files here.
@Lemme : Do you have pictures of beolab 8000’s with your 5mm brackers/final result looks?
I’m interested in how it looks compared to Matadors 4mm brackets, because the ‘curve’ looks smaller on the 4mm brackets…You discovered the secret! I think you are correct. The lammellas have a L-shape on top. Looks good, but indeed a lot of woodwork…
I’m going to print your brackets next week and buy all the needed wood. We are going to make 2 sets. For my dad and for myself.
What kind of ‘brackets’ are used on the beolab 8000 on this picture (the right one)?
This one hasn’t got a top-plate, so looks more like the original beolab 18. I like this al lot!
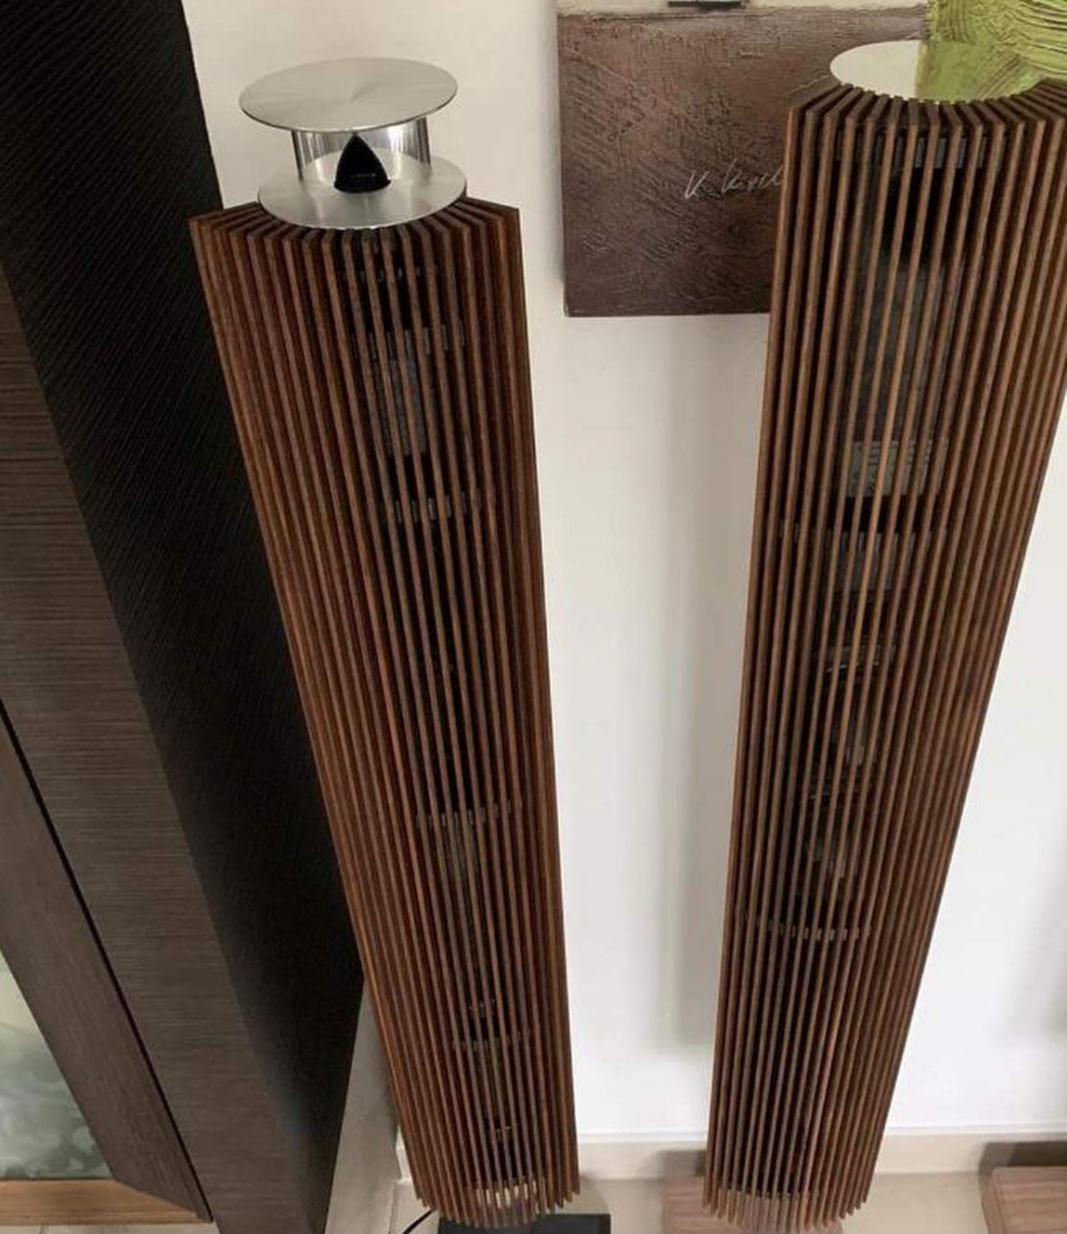
@matador Wouldn’t it be better looking if you also design/print (with black PLA/PETG/ABS) the top panel instead of using piece of black cardboard cut to shape?
Would it be possible to add this to the design?
What thickness (in mm) would give us the best/flush look?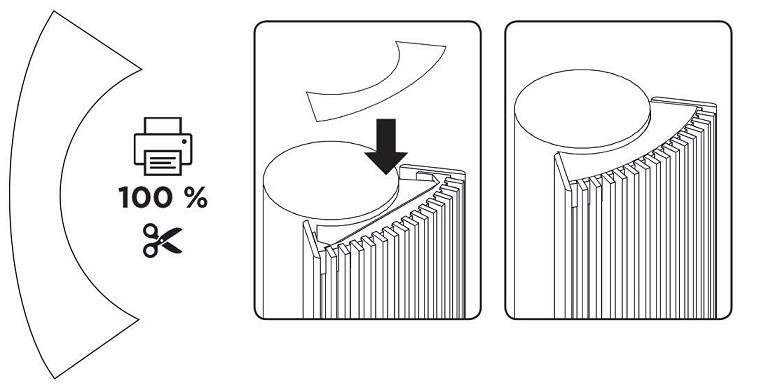
De pinouts/schemas heb ik online vaker gevonden en gebruikt. Moet goedkomen. Dankjewel!
@matador, thanks for your detailed answer and your verrrrrrrrrrry appreciated offer to design a STL file. I would love to use it (even if it’s only for test purpose or for a non working aesthetical model…)
I don’t know if you are going to draw it from scratch or use beolab 8000 and beolab 3 files which are already available online. It’s not my expertise, but I found 8000’s and 3’s in 3d renderings on https://3dmdb.com/en/3d-models/beolab/I understand your opinion about the correct working of an ALT tweeter. I don’t expect it will sound the same as my dads Beolab 3’s (without precise calculating/testing the shape of the ALT in combination with the original 8000 tweeter…), but I do want to try it, if possible.
It is easily being build back to stock…
The removal of the beolab 8000 top plate is easy.
I can do it on mine and give you the desired dimensions?
I totally understand that you don’t want to disassemble your 8000’s for ‘my needs’.Good thinking about the Audi Car installation. I always love the Audi A6 Bang&Olufsen automatic raising ALT tweeters in the dashboard 😉
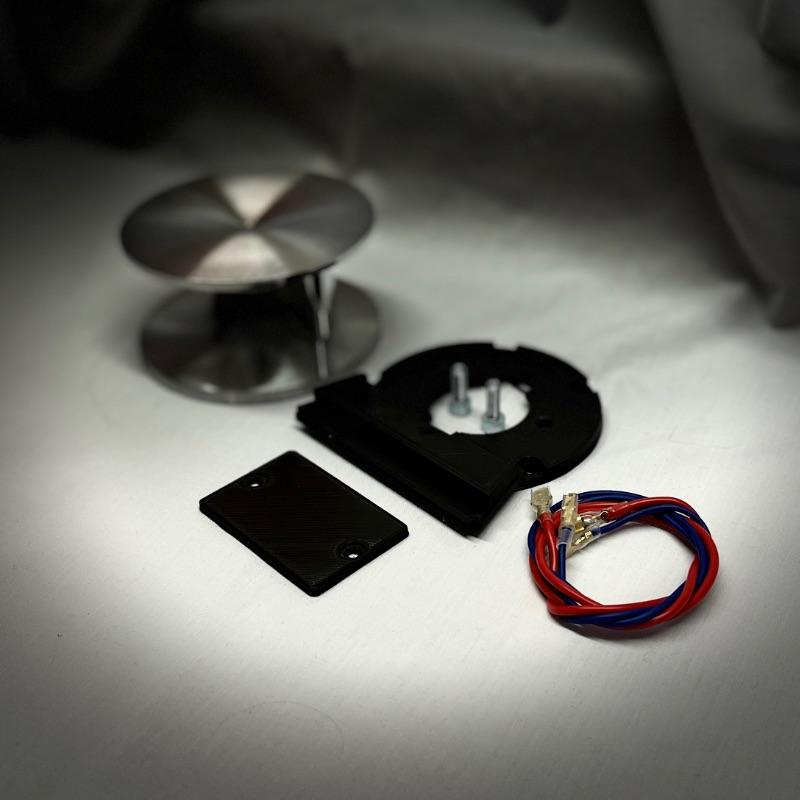
Vandaag heb ik jouw DIN pluggen al mogen ontvangen.
Duizend maal dank voor al deze stekkers. Zien er kwalitatief nog veel mooier uit dan b&o zelf gebruikt. Super tof dat je ze zo per post naar mijn stuurde. DANKKKKKKK.
Ik ga snel aan de slag met een proef cat 7 kabel en hou jullie op de hoogte.
@adyan thank you for the link! I’ve never seen this website before. 450,- euros is a little expensive, but they look excellent!… Still hoping I can find the STL files somewhere online so I can print them myself (and chrome them with spray or in a car-bodyshop)
It isn’t ‘too much’ for me. I like the modded acoustic lens look on the 80000’s. The Chrome could be a better match with the original 8000 housings, but it looks nice for a modded/diy job… But I totally understand your answer/opinion.
I also heard (from the Dutch person who made the above acoustic lens housings) that the sound from the 8000’s improved…
I want to try it myself.
Unfortunately I’m not able to design/draw this design myself. I know how to use a 3d printer, I have one. I can draw simple designs, but this acoustic lens is a little difficult for me.
I hope to find someone on this forum that wants to share his STL files (they are out there…. Looking at the printed examples in my above photos)
Who knows more about the beolab 8000 acoustic lenses?
You can use ALCOHOL KETONATUS 90% for this.t solves all the sticky rubber coating but not the thick rubber woofer ring.
Afterwards you can respray it with BLACK PLASTIDIP.
Another option is to buy a vinyl black sticker circle in the correct diameter. Place it over the ugly/damaged/sticky part and you’re done. Those stickers can be made by any local print/sticker design shop.
I see some B&O second life dealers use this ‘secret’ method 😉
Why don’t you use a ‘beolab trigger cable for this?
Soundsheavenly makes them.
powmasscables makes them.
Or make it yourself. Put 2.5~5v on pin 4 and pin 7 for ground and all beolab speakers switch on…
Gezien en je via PB geantwoord.
Dank dank dank.
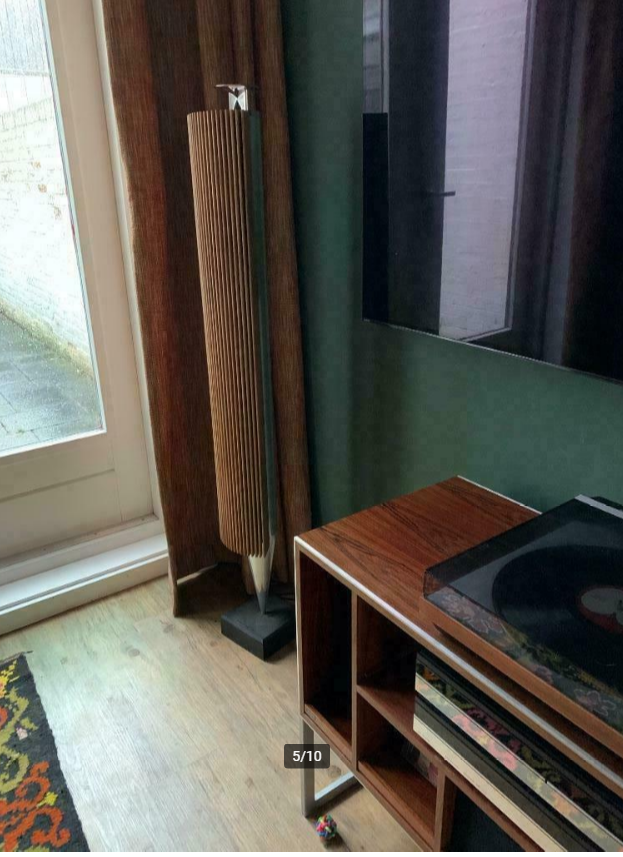
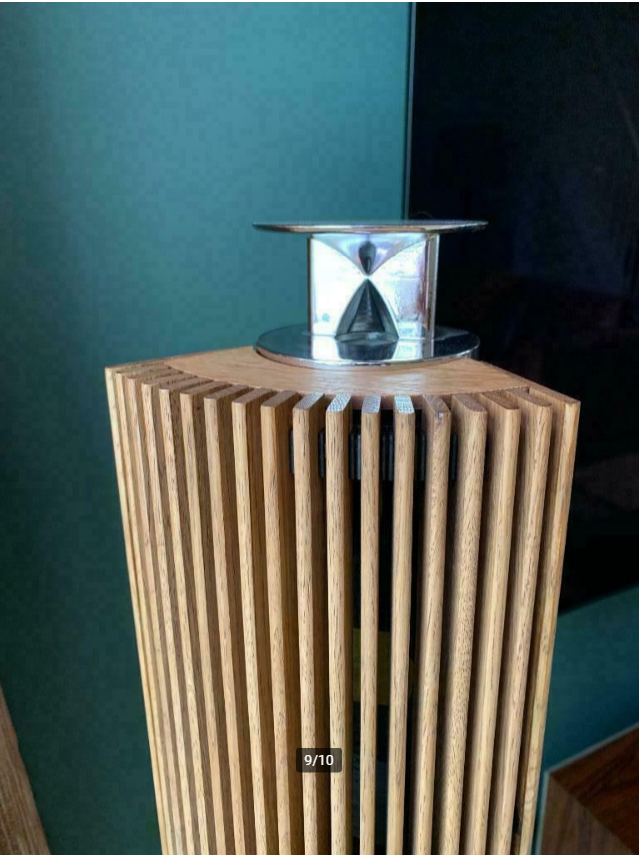
And make our own accoustic lens on the beolab 8000
(In The Netherlands I found a person who 3d-printed this top cover. Re-using, rewiring, relocating the original 8000 tweeter).
He sprayed the 3d-printed models with chromespray.
Unfortunately he never shared his desing/stl file….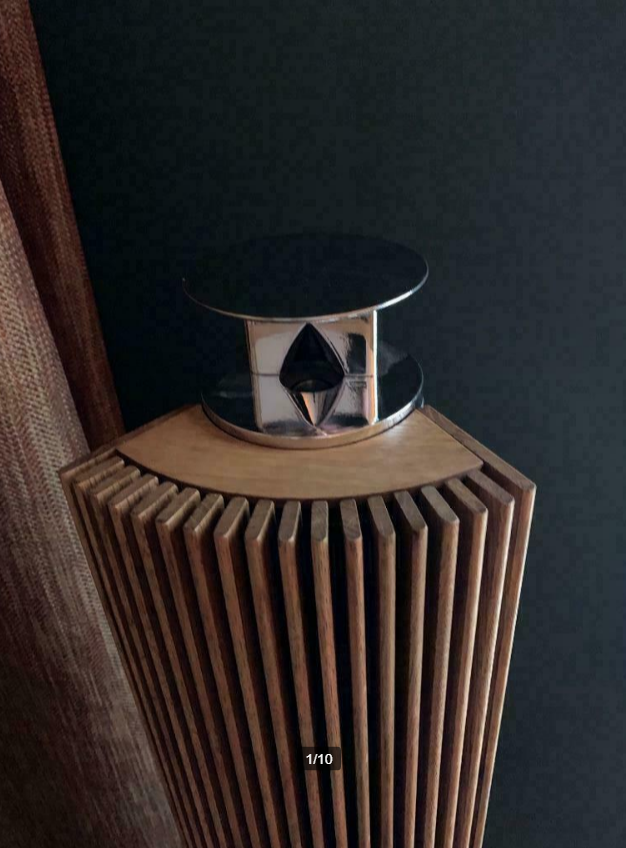
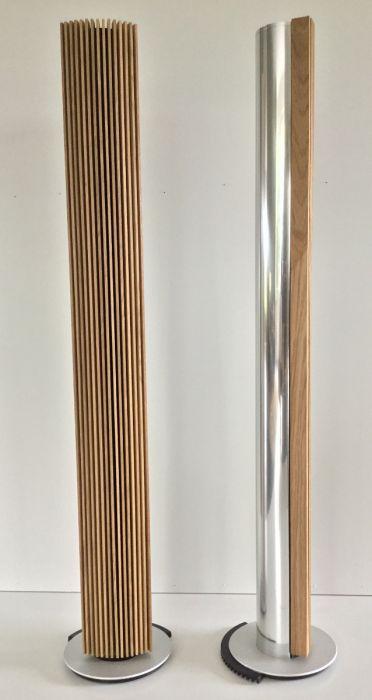
And @matador would it also be possible for you to design (stl files) those clamps for the 6000 series?
I have Beolab 8000 and Beolab 6000 and would be a perfect match.
Examples:
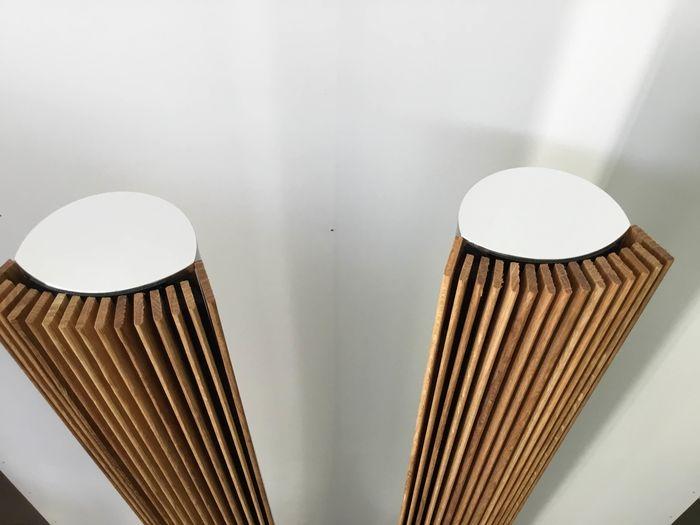
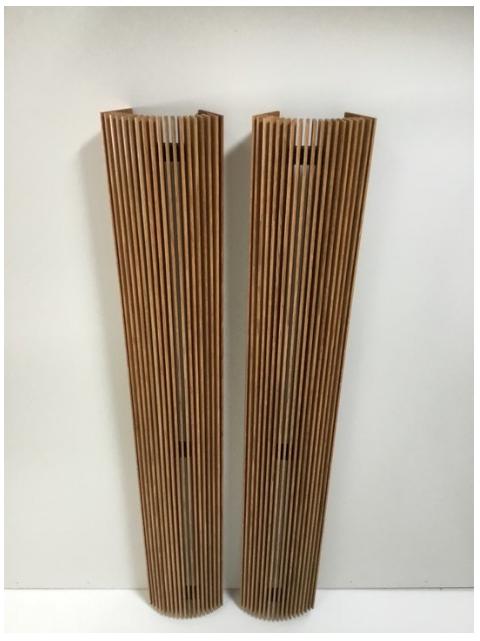
WaaauuuW
Briljant!!!I’m going to print the clamps (your stl files) and look locally (The Netherlands) for the best wood (matching my wooden herringbone teak floor)
I saw that your wooden lamellas are angular and original BeoLab 18 lamellas are rounded.
Rounded might look a little nicer/more original?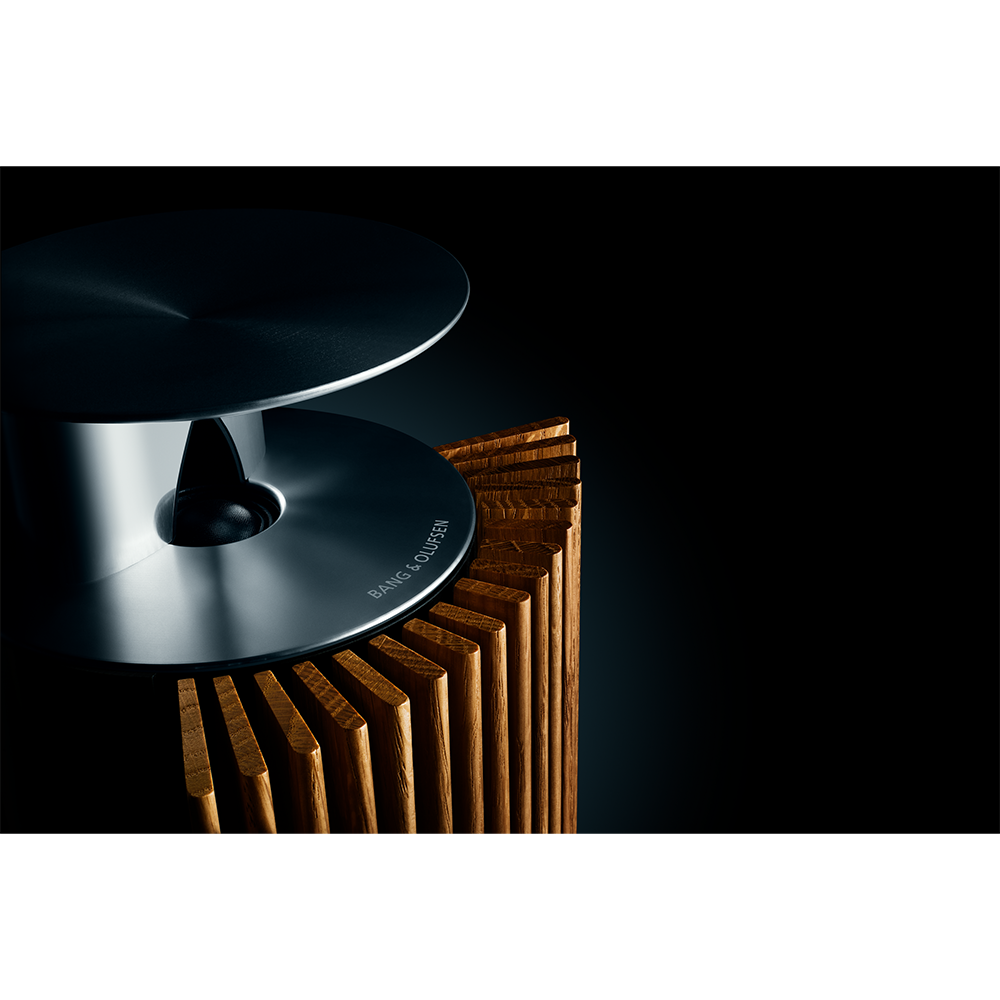
- AuthorPosts
